In 2023, Gmail still reigned as the best email provider with a suite of benefits and extensions to up your e-mail game. From a very friendly interface to indispensable add-ons, we believe there’s little use of parting ways with a Gmail account.
So, if you’re looking for a guide for how to create a new Gmail account and our top picks for putting it to good use, take note (or open Gmail in a new tab) and follow the steps below!
In this step-by-step guide, we’ll be covering:
- Perks and Benefits of a Gmail Account
- How to Set Up a New Gmail Account
- Picking the right email address
- Best Gmail productivity add-on
- Tips & Tricks for your Gmail account
Perks and benefits of a Gmail account
✅ You get 15GB of storage. That’s more than you need, for years to come.
✅ Gmail is browser based and fast to load. This means access from a new device if needed and no delays in receiving or sending your mail.
✅ Gmail rarely crashes. With globally distributed servers, Google is legendary in their reliability.
✅ Labels, filters, and views: your Gmail inbox is modular, allowing you to create different inboxes or views using your own rules, labeling conversations and contacts, and filtering how and where you see messages. You can also switch up themes. 1UP for your organization and efficiency.
✅ Accurate spam filtering keeps your inbox de-cluttered from all those scam and pesky emails.
✅ Fast email search – as expected from the world’s leading search engine.
✅ Manage multiple addresses: you can add your Hotmail, Yahoo, or other addresses to be centrally and conveniently managed from Gmail.
✅ Add-ons and extensions: Deck your Gmail with all the functionalities, tools, and integrations you need to improve your experience or streamline your business.
Last but not least:
❤️ It’s free.
How to create a new Gmail account
Step 1: First, you need to head over to Gmail (If you are already connected to a Gmail account, click on your avatar > Add another account)
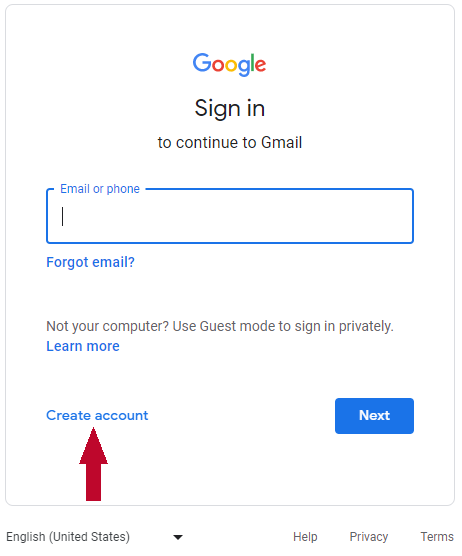
Step 2: Click on the “Create Account” button (shown below)
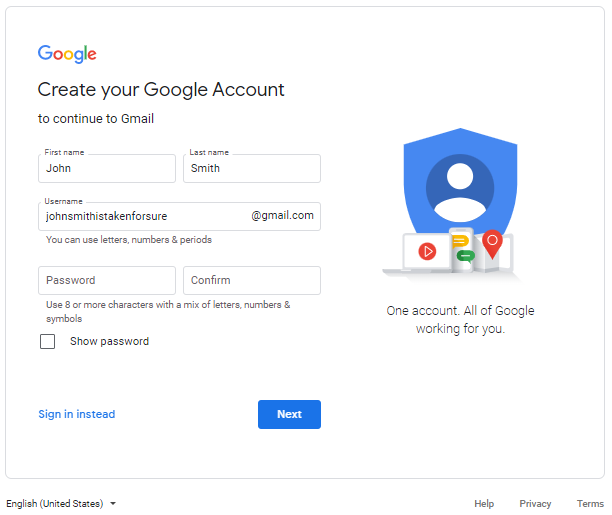
Step 3: Once the form pops up, you need to fill in the fields for your name, your selected username, and your password.
(For tips on selecting the right username, jump here)
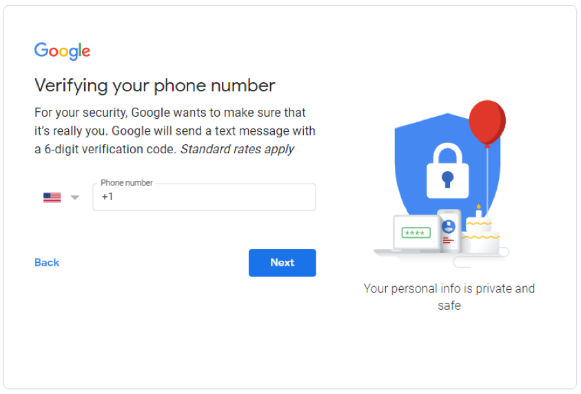
Step 4: Enter your phone number, and make sure your phone is within reach. Google uses a two-step security to keep your account secure.
You should receive a 6-digit code through text message.
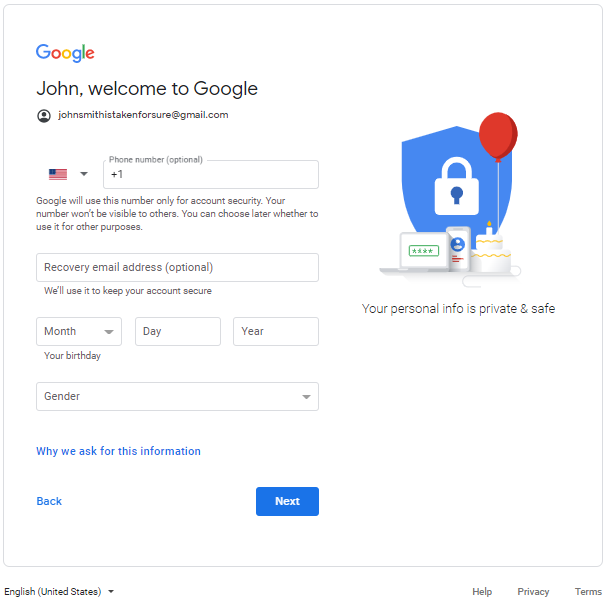
Step 5: After verifying your account, you will then access a form to fill in some personal information. Google will ask you for a recovery email address, date of birth, and gender. (You can always click on “Why we ask for this information” to find out how Google uses this data on signup)
Step 6: Your final step is agreeing to Google’s Terms of Service and Privacy Policy. After reviewing this information, you can go forward by clicking “I Agree”.
Step 7: You now have a new Gmail account 🎉
Expect a welcome email from the Gmail team to get you started!
Picking the right email address
Surely, you want an email address that is representative, easy to memorize, yet looks clean or professional. Things to keep in mind when selecting your that username:
- Convey the right first impression: If you’re sharing this address for business purposes you want it to look professional
- Reduce the risk of being marked as spam: Don’t impersonate a brand or celebrity, and avoid random or long combinations of letters/numbers.
Remember your email is your public address on the internet, keep it credible and trustworthy.
The common convention for email addresses is a combination of your name and surname. Ex: [email protected]
But what if this username is already taken?
You can work around this by switching things up like:
Unfortunately, Gmail doesn’t factor in or distinguish the presence of periods: John.smith is the same as john.smith; jsmith is the same as j.smith; etc…
Best Gmail Productivity Add-On
With a Gmail account, you also get access to Google Docs, Sheets, Slides and Calendar.
But that’s just the tip of the iceberg.
On the Google Marketplace, you can access thousands of add-ons to push your Gmail’s capabilities to new levels. Check out our picks for the top 25 Gmail tools and apps
Our best pick to boost your productivity and upskill your email sending is Mailmeteor.
With Mailmeteor, you can easily send hundreds of personalized emails through Gmail, saving you valuable time. Plus, you can track the status of your emails in real-time, giving you peace of mind and the ability to follow up as needed.
Mailmeteor puts extra emphasis on user privacy, and delivers a clear and user-friendly interface to exponentially grow your Gmail’s capabilities with advanced emailing feature. Bonus: Mailmeteor is recommended by Google itself as part of the Recommended for Google Workspace program.
Tips and Tricks for Your Gmail Account
So now that you created a new Gmail account, you will want to customize it and learn a few pointers to make the best out of your experience. Here’s a list of some really handy tips and tricks for your Gmail:
The Shortcut Cheat Sheet
Go into your Gmail and hit: Shift + ? – now you can see every Gmail shortcut available.
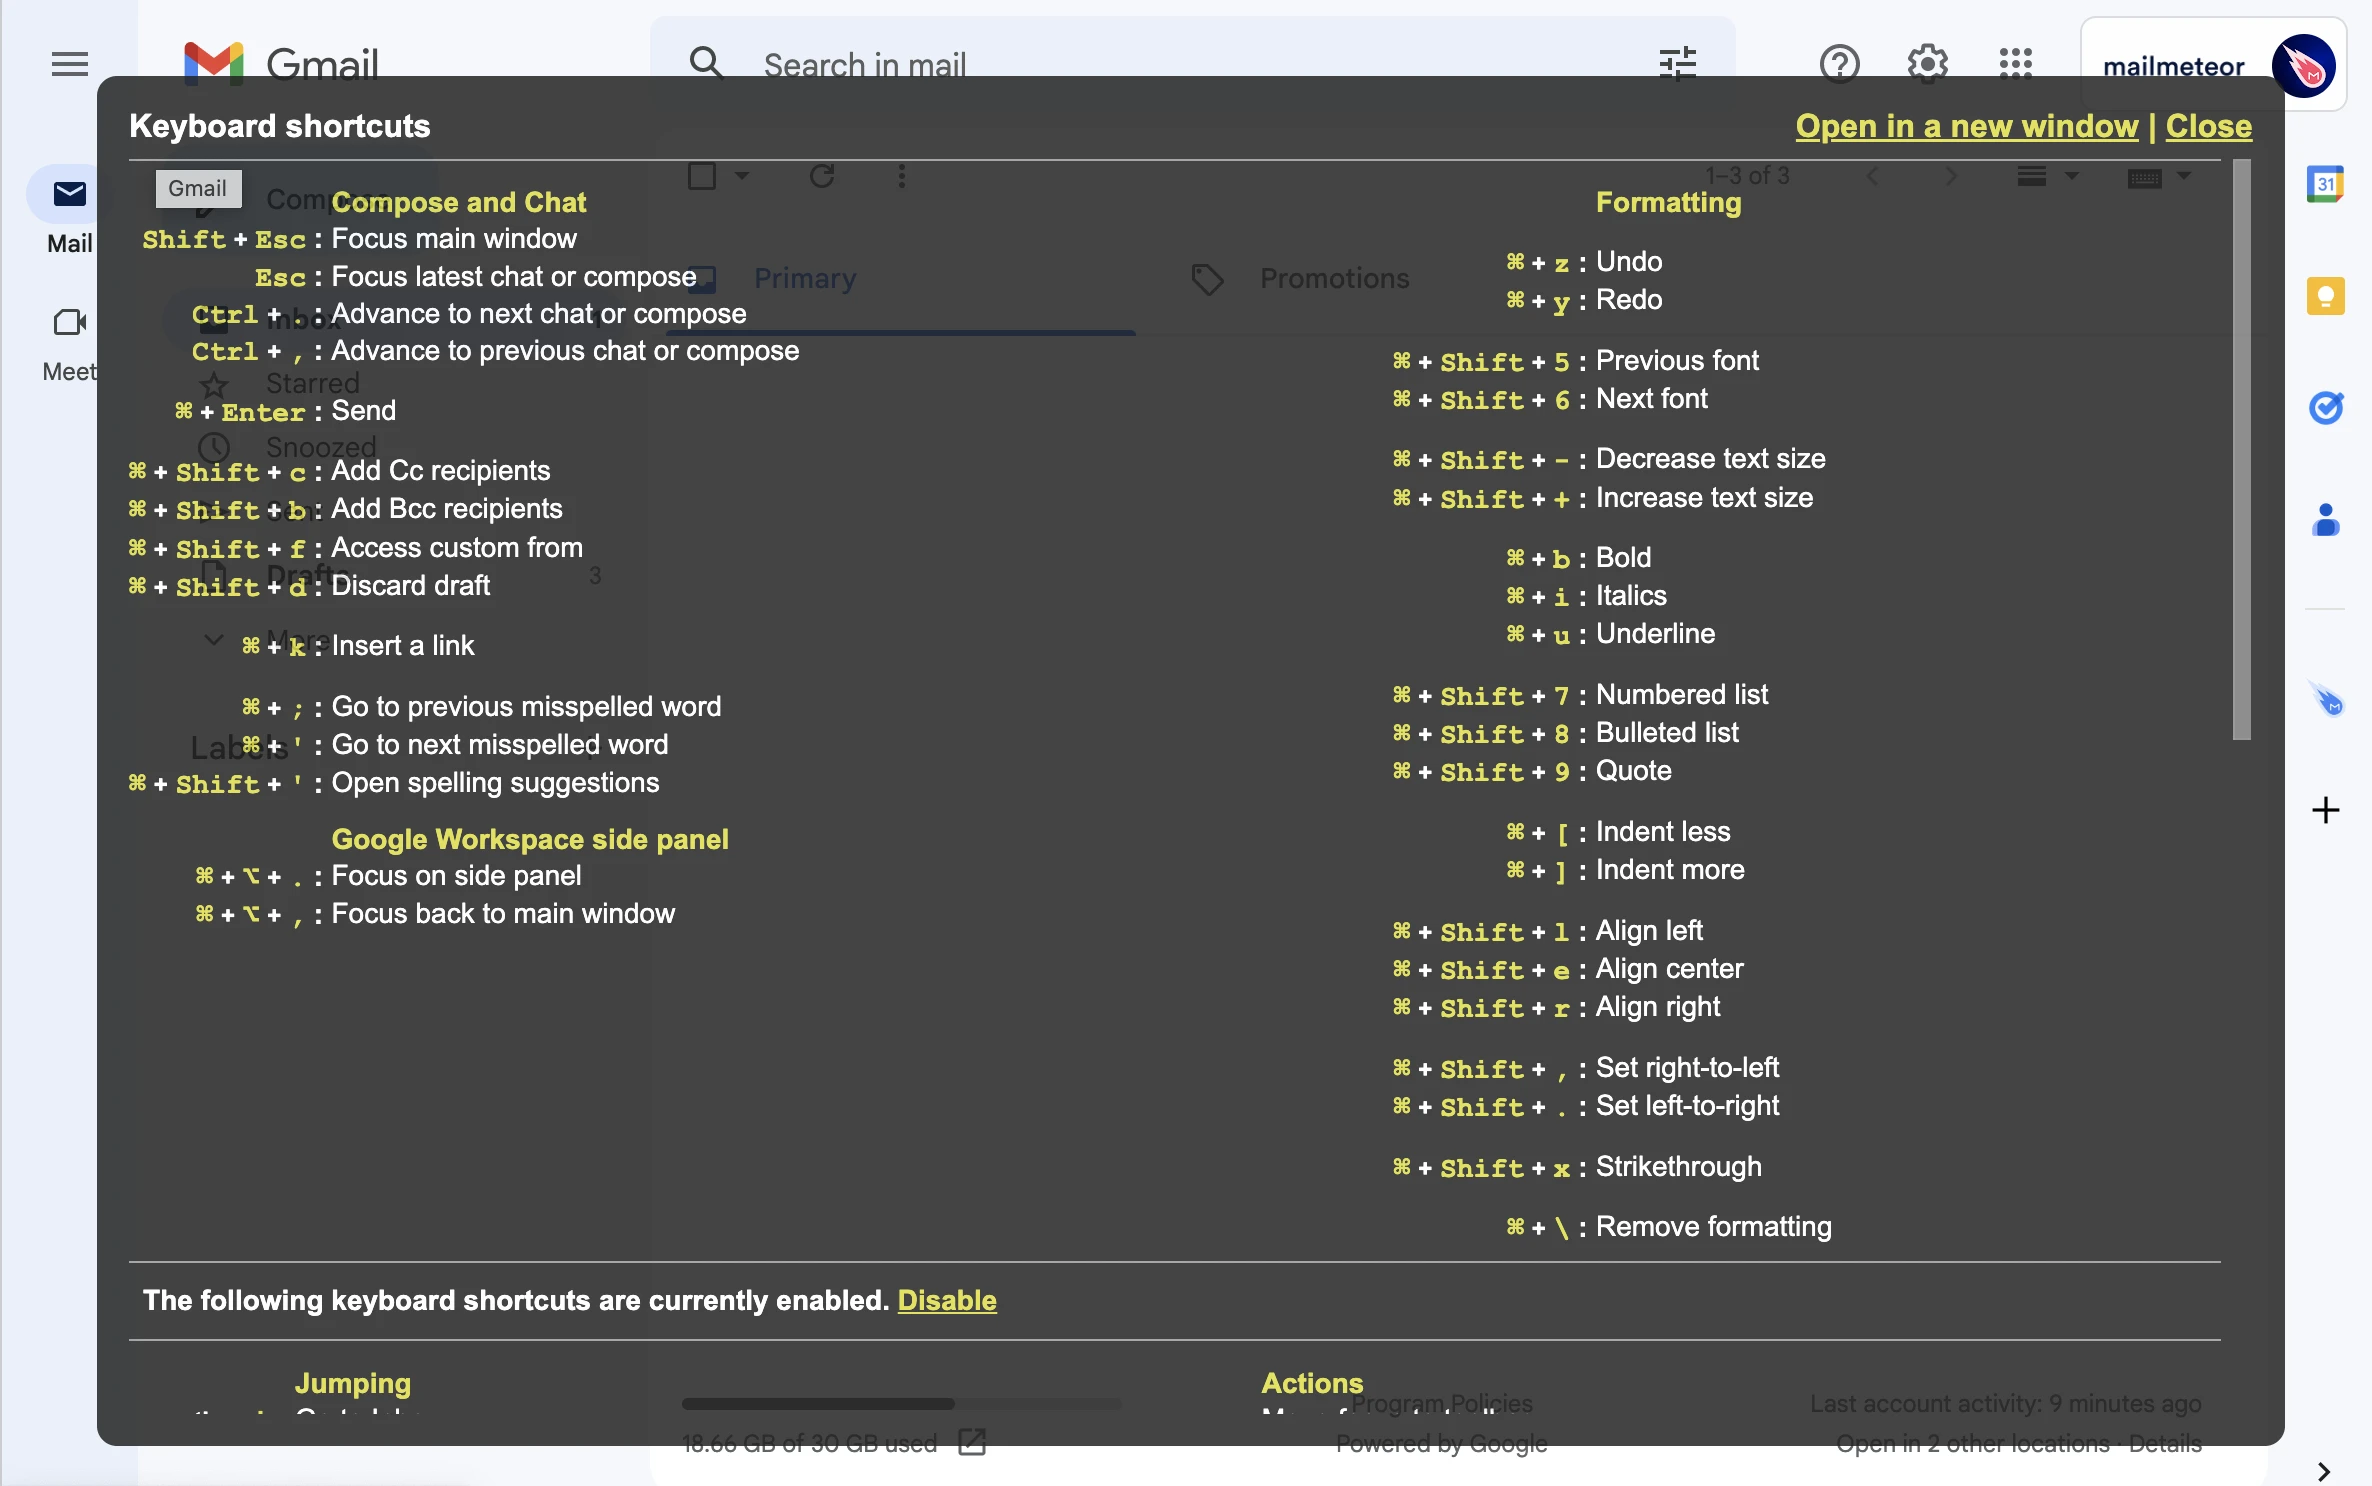
You can also click on the gear icon (settings) > See all settings > Advanced (top).
Enable “Custom keyboard shortcuts”.
Save changes – Gmail will reload.
When you go back to “See all settings”, now you have a “Custom shortcuts” tab where you can customize and edit your shortcuts!
Add other email accounts to your Gmail
Want to add your Hotmail, Outlook, iCloud or other email providers and manage them from one place?
-
On desktop: Gear icon (settings) > See all settings > Accounts and Import > Check mail from other accounts > Add a mail account. Type in the external email address you want to link, follow the prompts to get set up!
-
On mobile: Tap your profile picture in the Gmail app and select Add another account. Select the type that fits your need and enter the credentials. You can now check your multiple emails from your phone!
Undo Send
Gmail gave us a lifesaver with this one. Ever sent an email, only to realize it had a typo or missing an attachment (or worse…). With Undo Send you can recall an email before it’s too late.
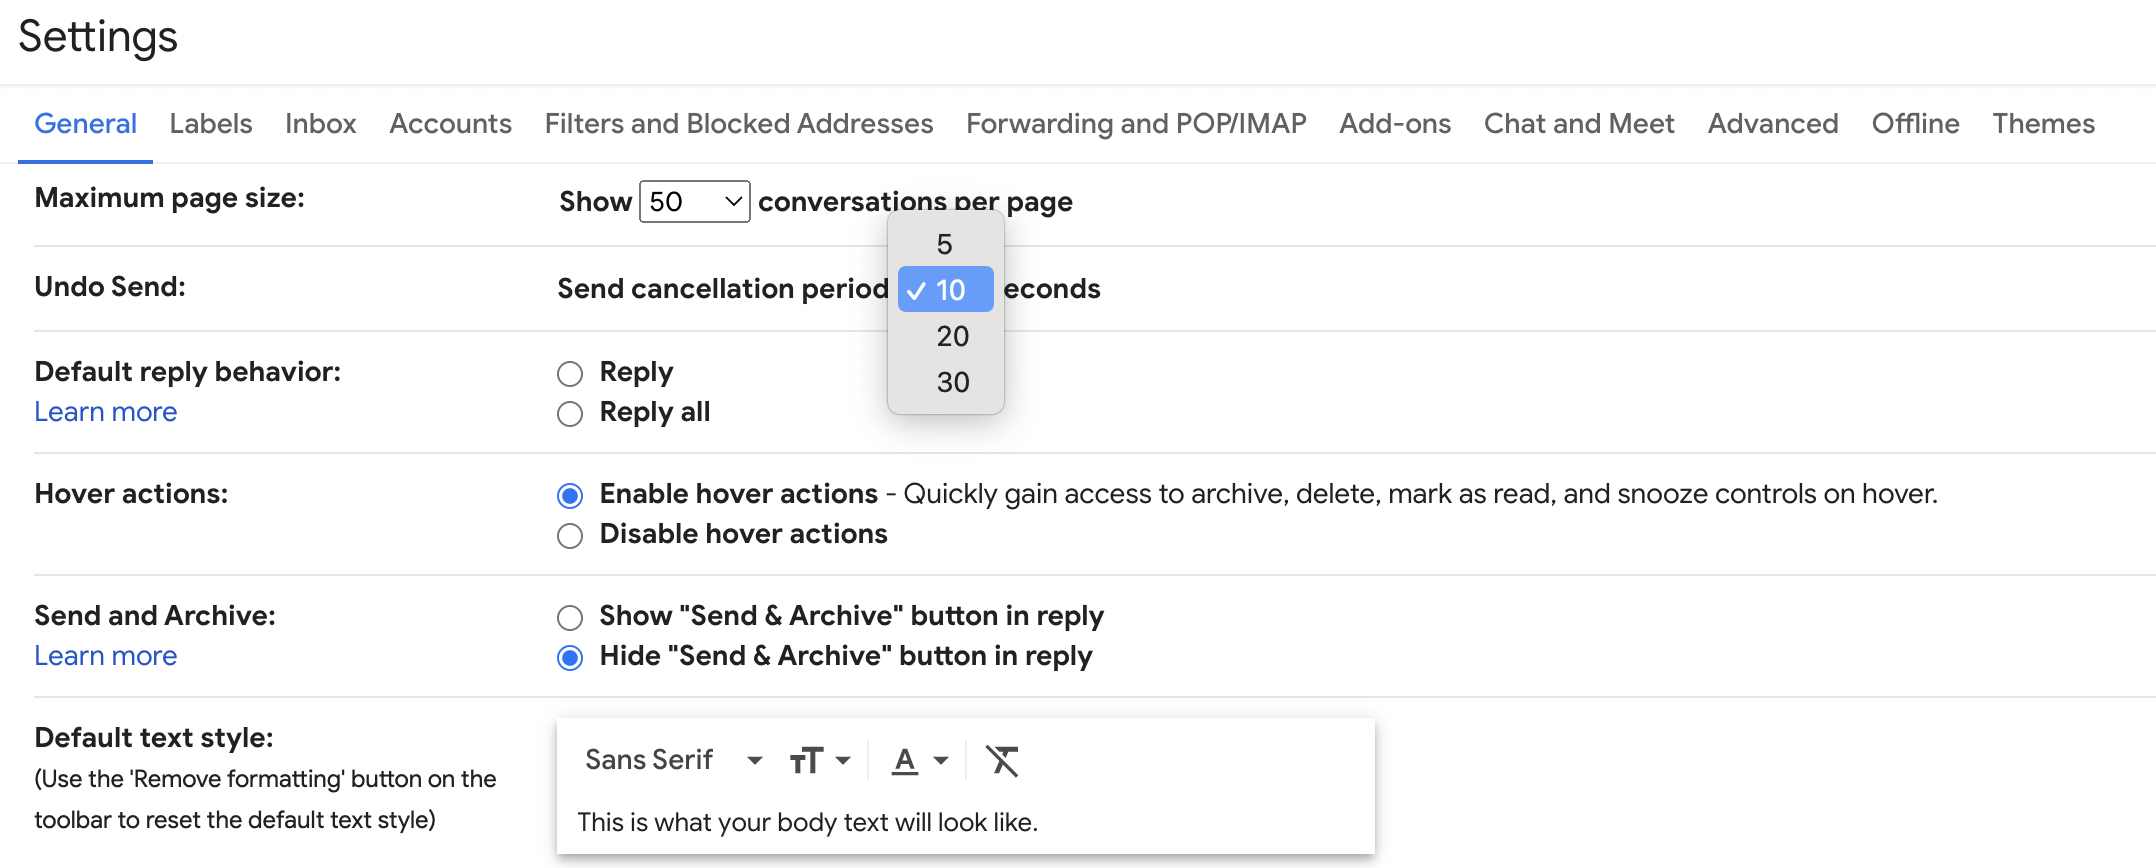
Did you know you can also edit how long you get to unsend?
Gear icon (settings) > See all settings > General > Undo Send and click the drop-down menu to select the time delay (5, 10, 20, or 30 seconds). Don’t forget to save changes!
Check out our blog on 9 must-have Gmail skills everyone should know for some more tips or take your emailing skills to the next level with these 10 Tips to Send Emails Like a Boss
