GMX SMTP settings
Step-by-step setup guide to configure GMX Mail with SMTP
Want to send and receive your GMX messages from another email client, like Gmail, Thunderbird, Apple Mail, or Outlook? To do so, you’ll need to configure your GMX SMTP settings. Here’s everything you need to know.
What Are the GMX SMTP Settings?
The Simple Mail Transfer Protocol (SMTP) is a well-known email protocol that you can use to send messages over the Internet. Here’s the information you’ll need to configure your GMX SMTP settings:
- SMTP Server: smtp.gmx.com
- SMTP Port: 25 (no TLS/SSL required, 465 (with SSL) or 587 (with TLS)
- Authentication: Yes
- SMTP Username: Your GMX email address ([email protected])
- SMTP Password: Your GMX Mail password
Once you’ve configured your SMTP settings, you’ll be able to send emails using the GMX SMTP server. But if you also want to receive messages, you’ll need to set up another email protocol, such as POP3 or IMAP.
What Are the GMX POP Settings?
You can configure POP3, the latest version of the Post Office Protocol, if you plan to use GMX Mail from just one device. Once POP3 has been set up, you can download your messages from the GMX email server to your preferred email client.
- POP Server: pop.gmx.com
- POP Port: 995
- Requires SSL: Yes
- POP Username: Your GMX email address ([email protected])
- POP Password: Your GMX Mail password
What Are the GMX IMAP Settings?
If you’re planning to access GMX Mail from multiple devices, you may want to configure IMAP instead. With IMAP, your messages are stored on a mail server, but you can access them as if they were located on your device.
- IMAP Server: imap.gmx.com
- IMAP Port: 993
- Requires SSL: Yes
- IMAP Username: Your GMX email address ([email protected])
- IMAP Password: Your GMX Mail password
How to Configure Your GMX SMTP Settings?
Now that you know the incoming and outgoing mail servers for GMX, let’s configure your GMX SMTP settings in your email client. In this example, we’ll be using Gmail, but this also works with Outlook, Thunderbird, and other popular email software.
Step 1: Open your email client.
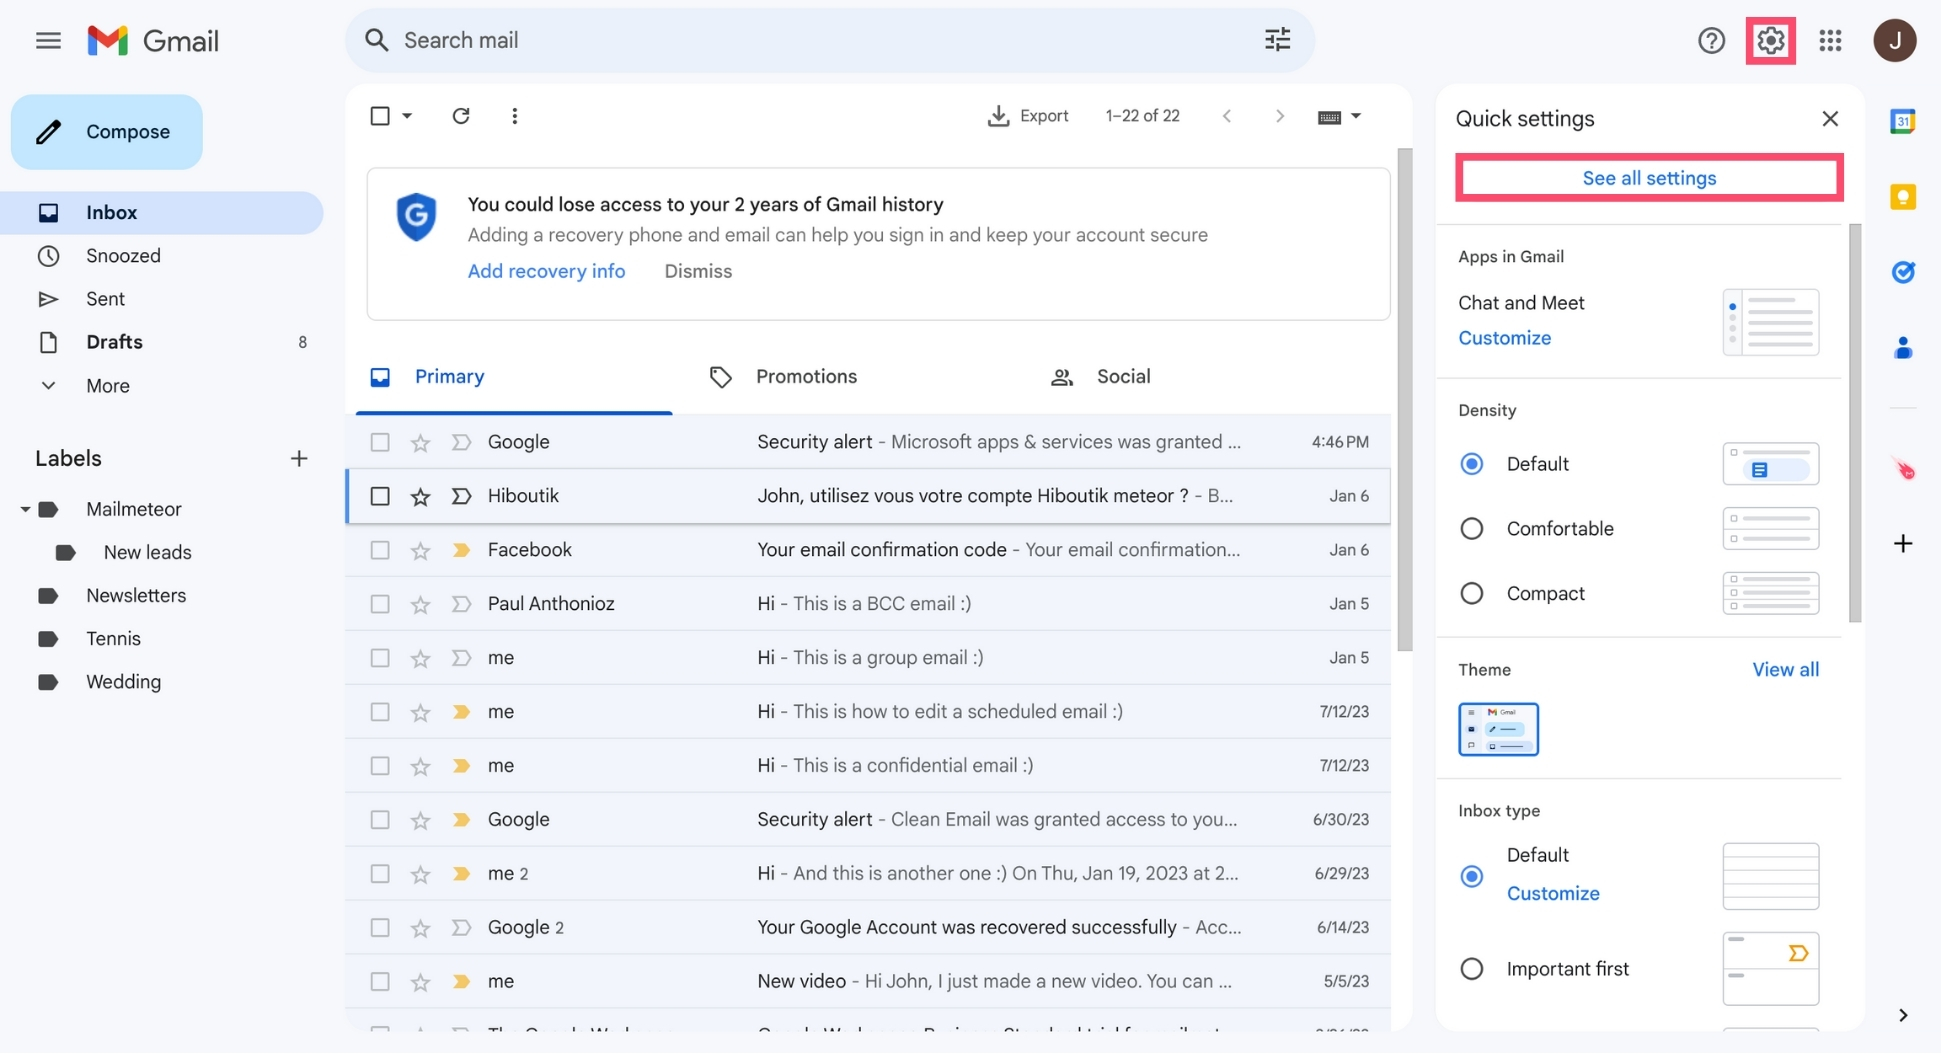
Step 2: Go to “Settings”.
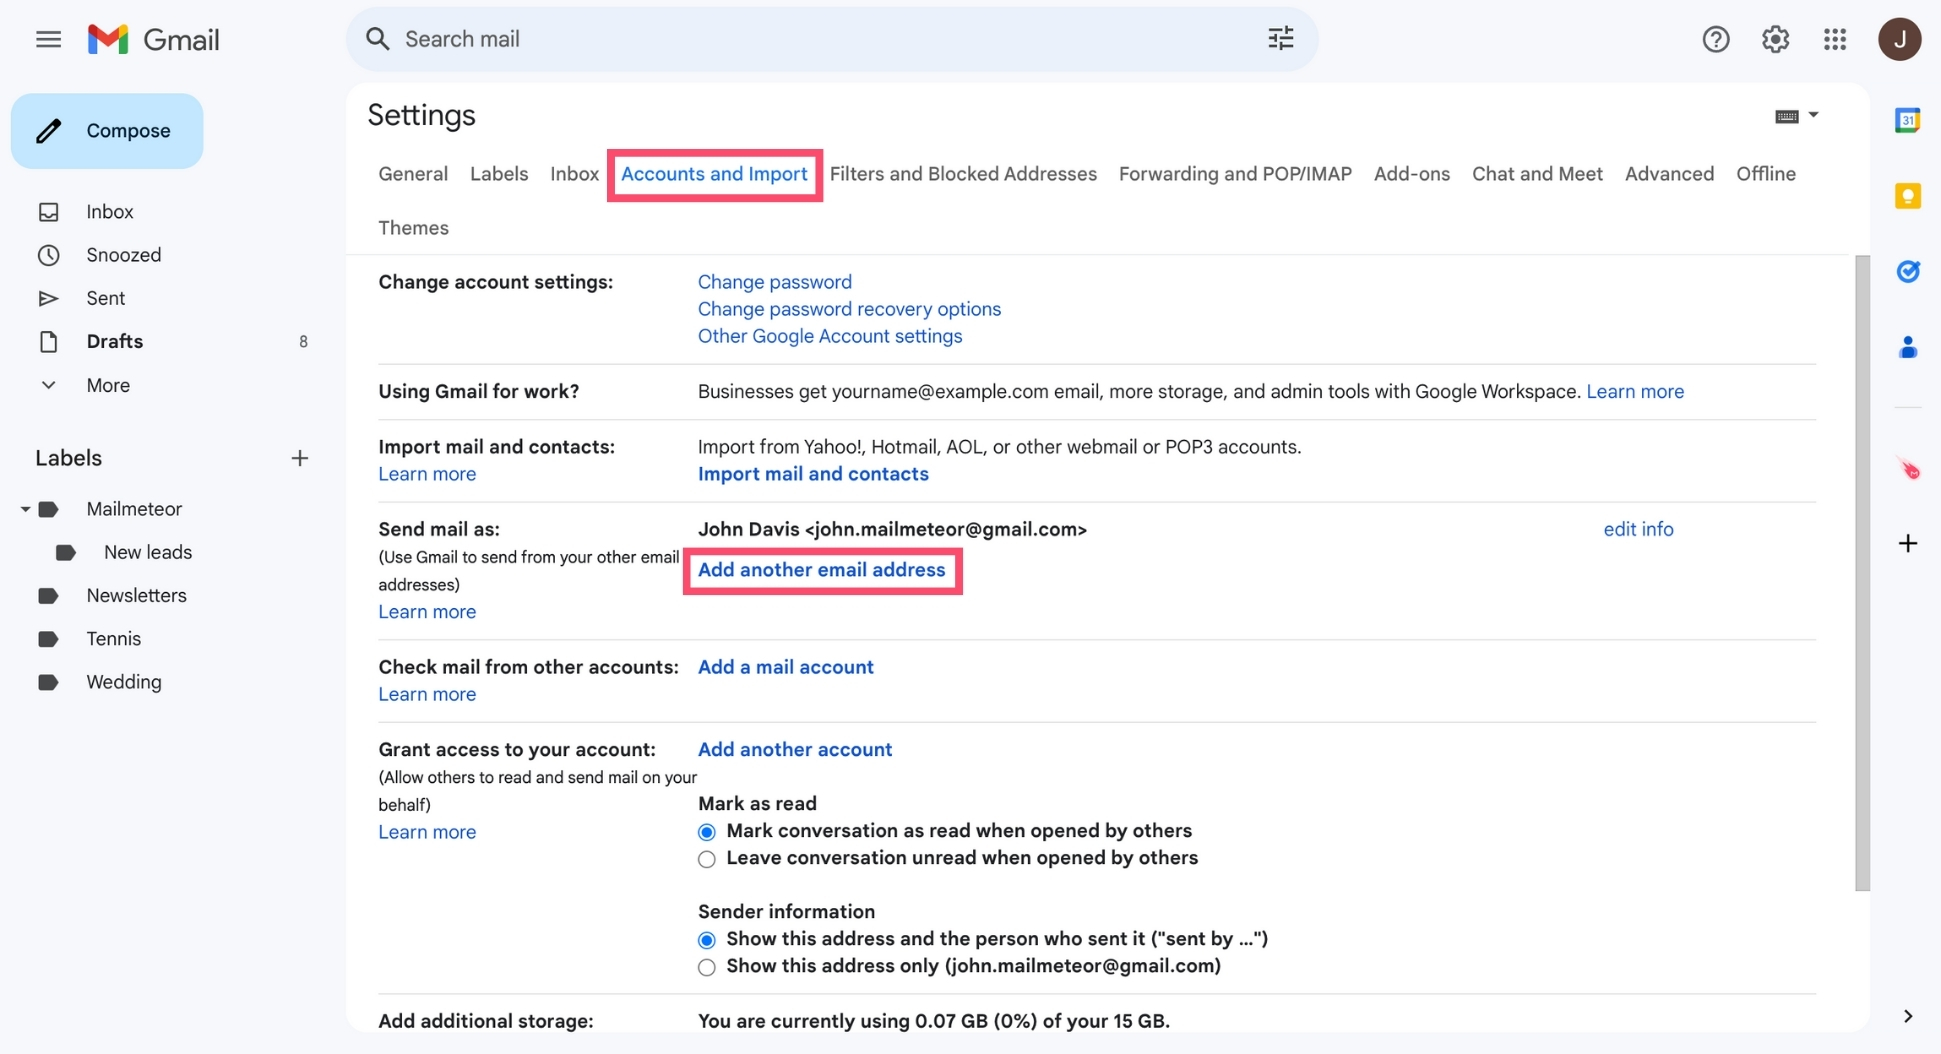
Step 3: Under “Send email as”, click “Add another email address”.
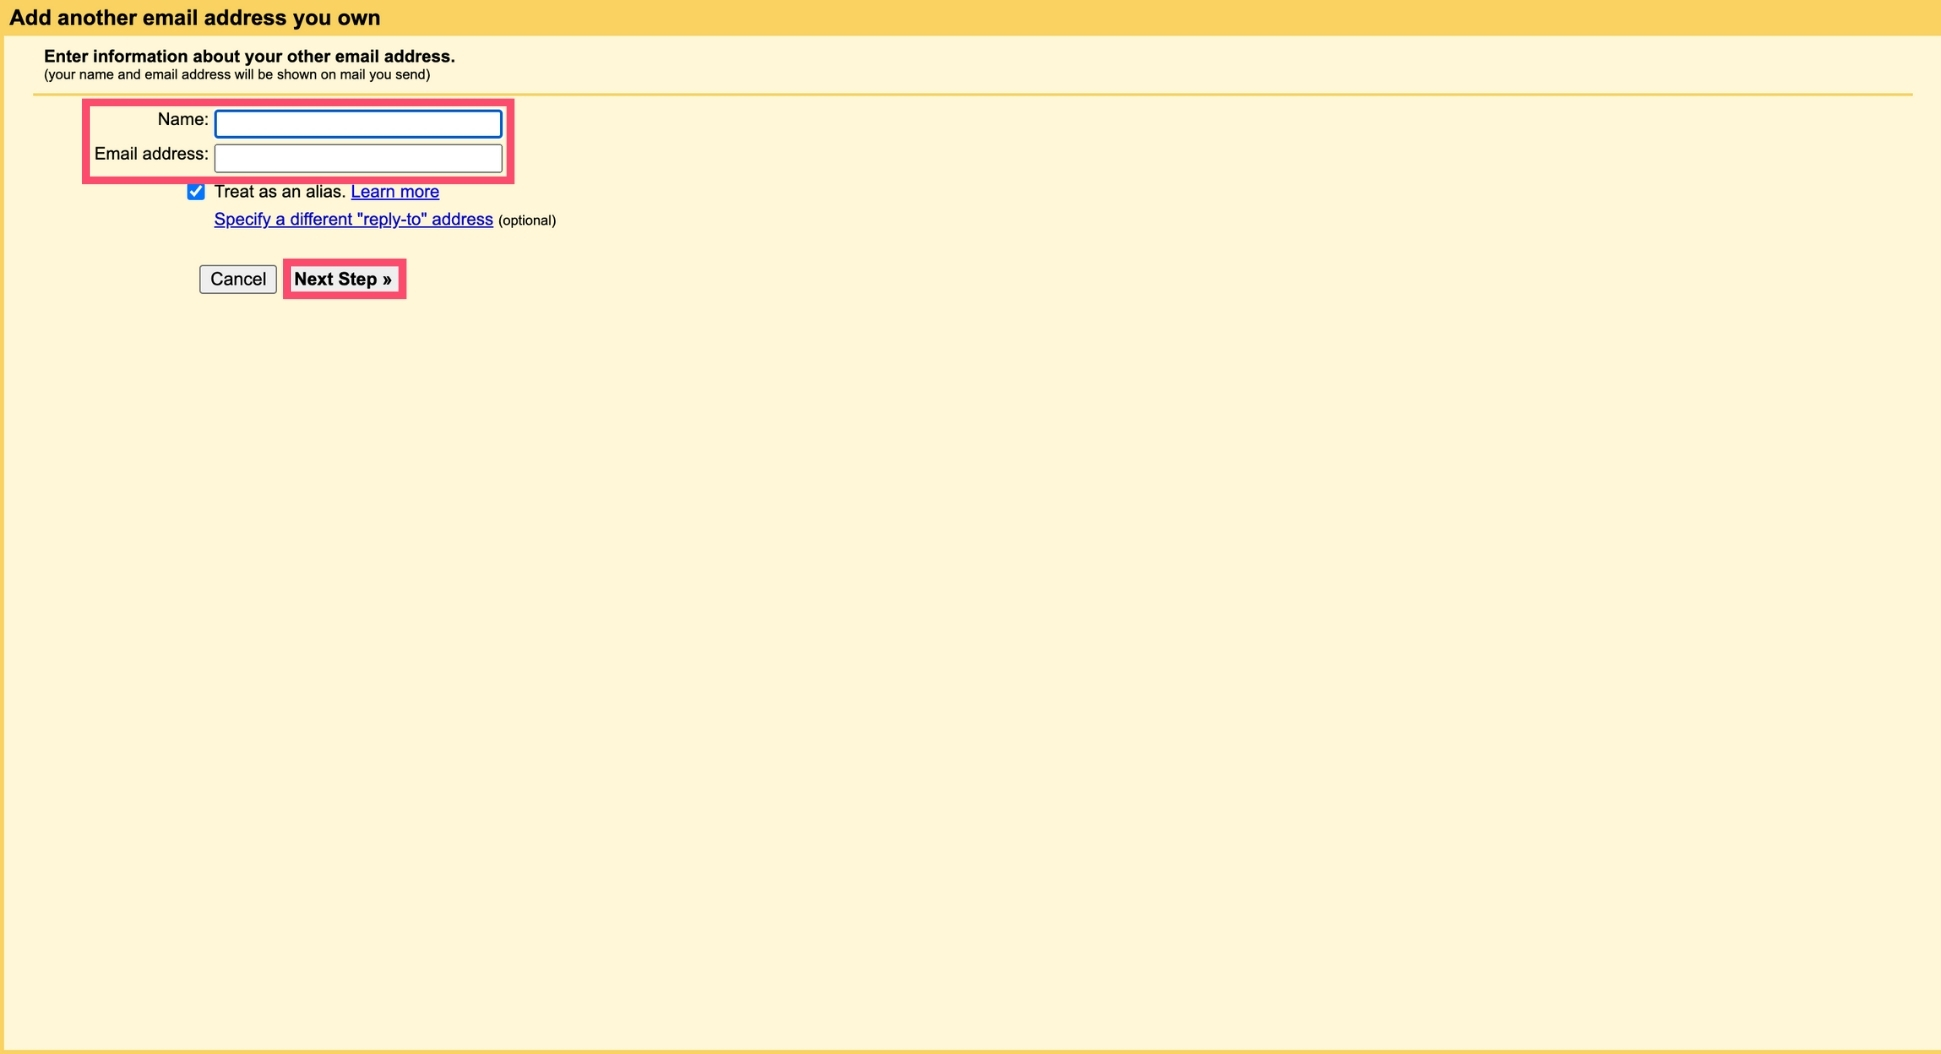
Step 4: Type your GMX email address and password.
Step 5: Enter smtp.gmx.com as the SMTP server address, choose 25, 465, or 587 as your SMTP port number, and select SSL or TLS as your encryption method.
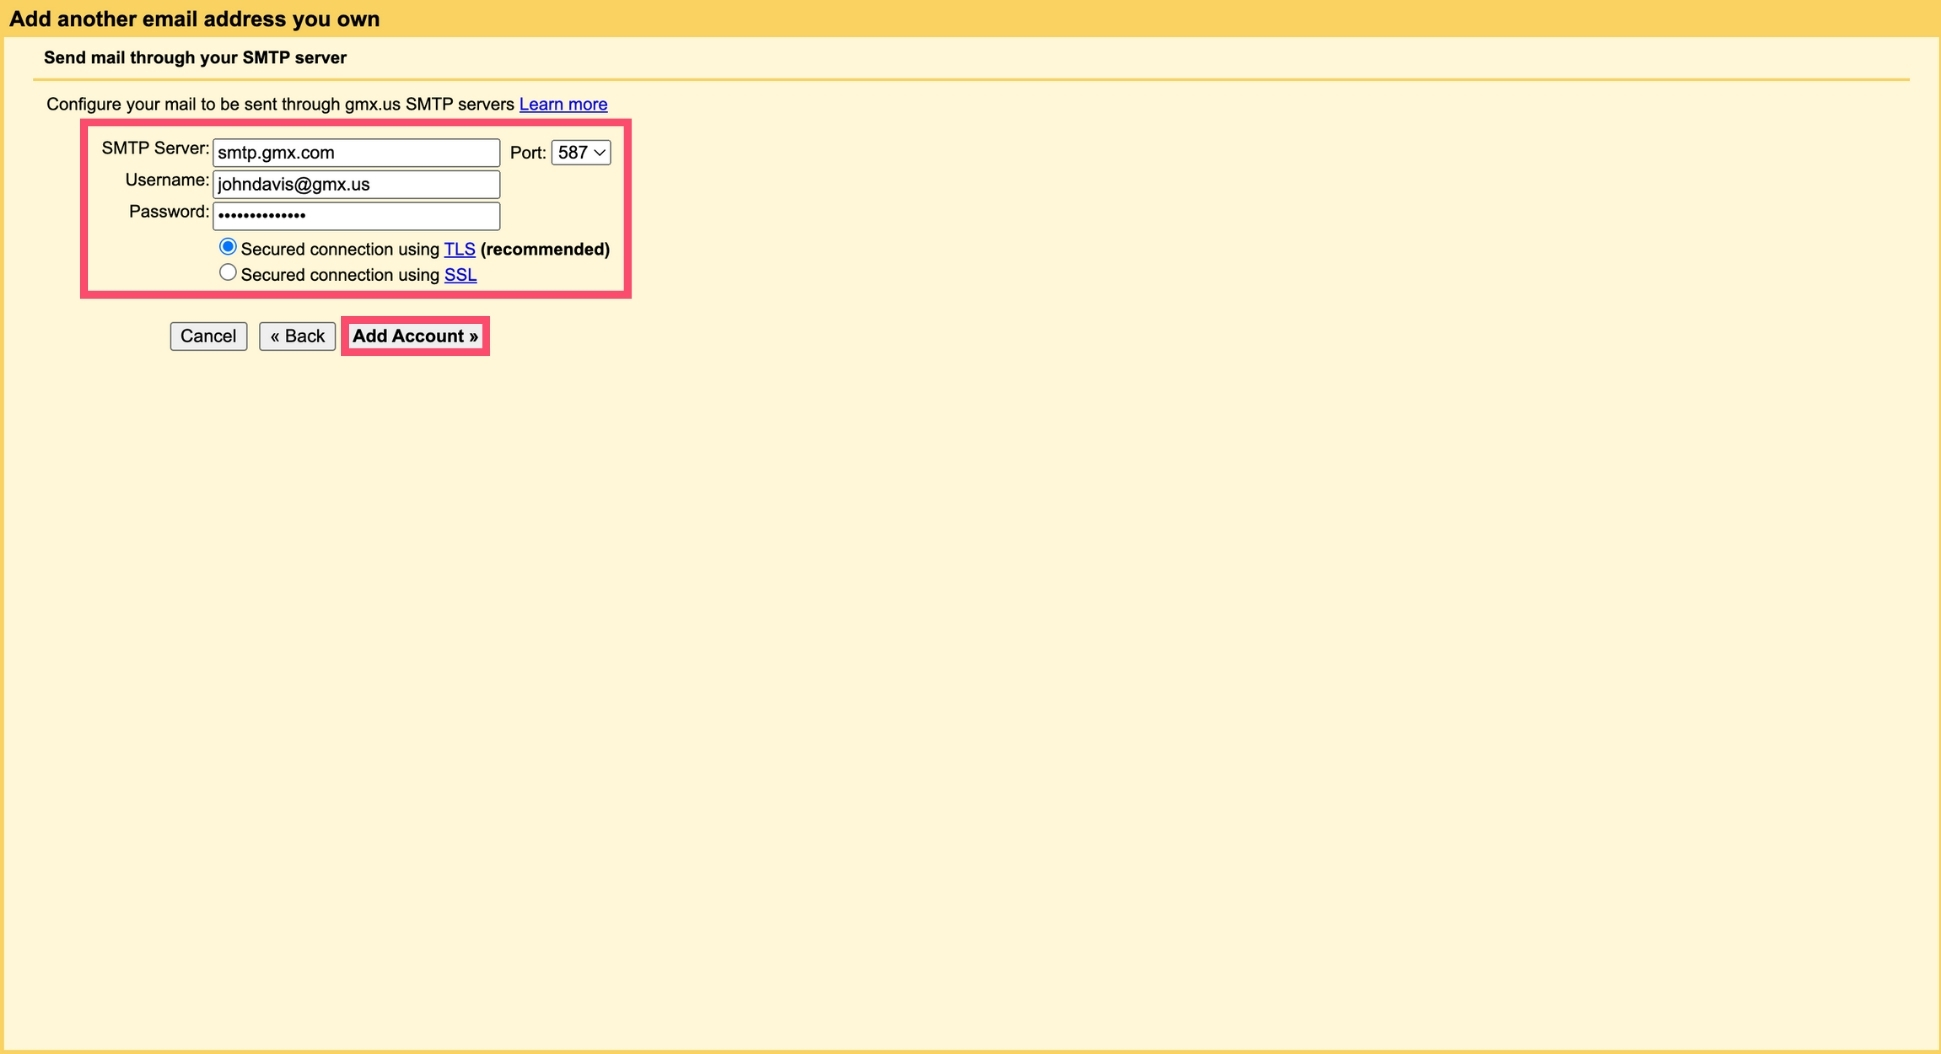
And voilà. You can now save your changes. Before you send any messages, make sure to send a test email to check if your SMTP configuration is working properly. You can also test your GMX SMTP settings with a free tool.
How to Test Your GMX SMTP Configuration?
You can use our free SMTP Tester to check if your GMX SMTP configuration is correct. Here’s how it works:
- Step 1: Go to Mailmeteor’s SMTP Test tool.
- Step 2: Enter your GMX SMTP configuration details.
- Step 3: Click “Test Configuration”.
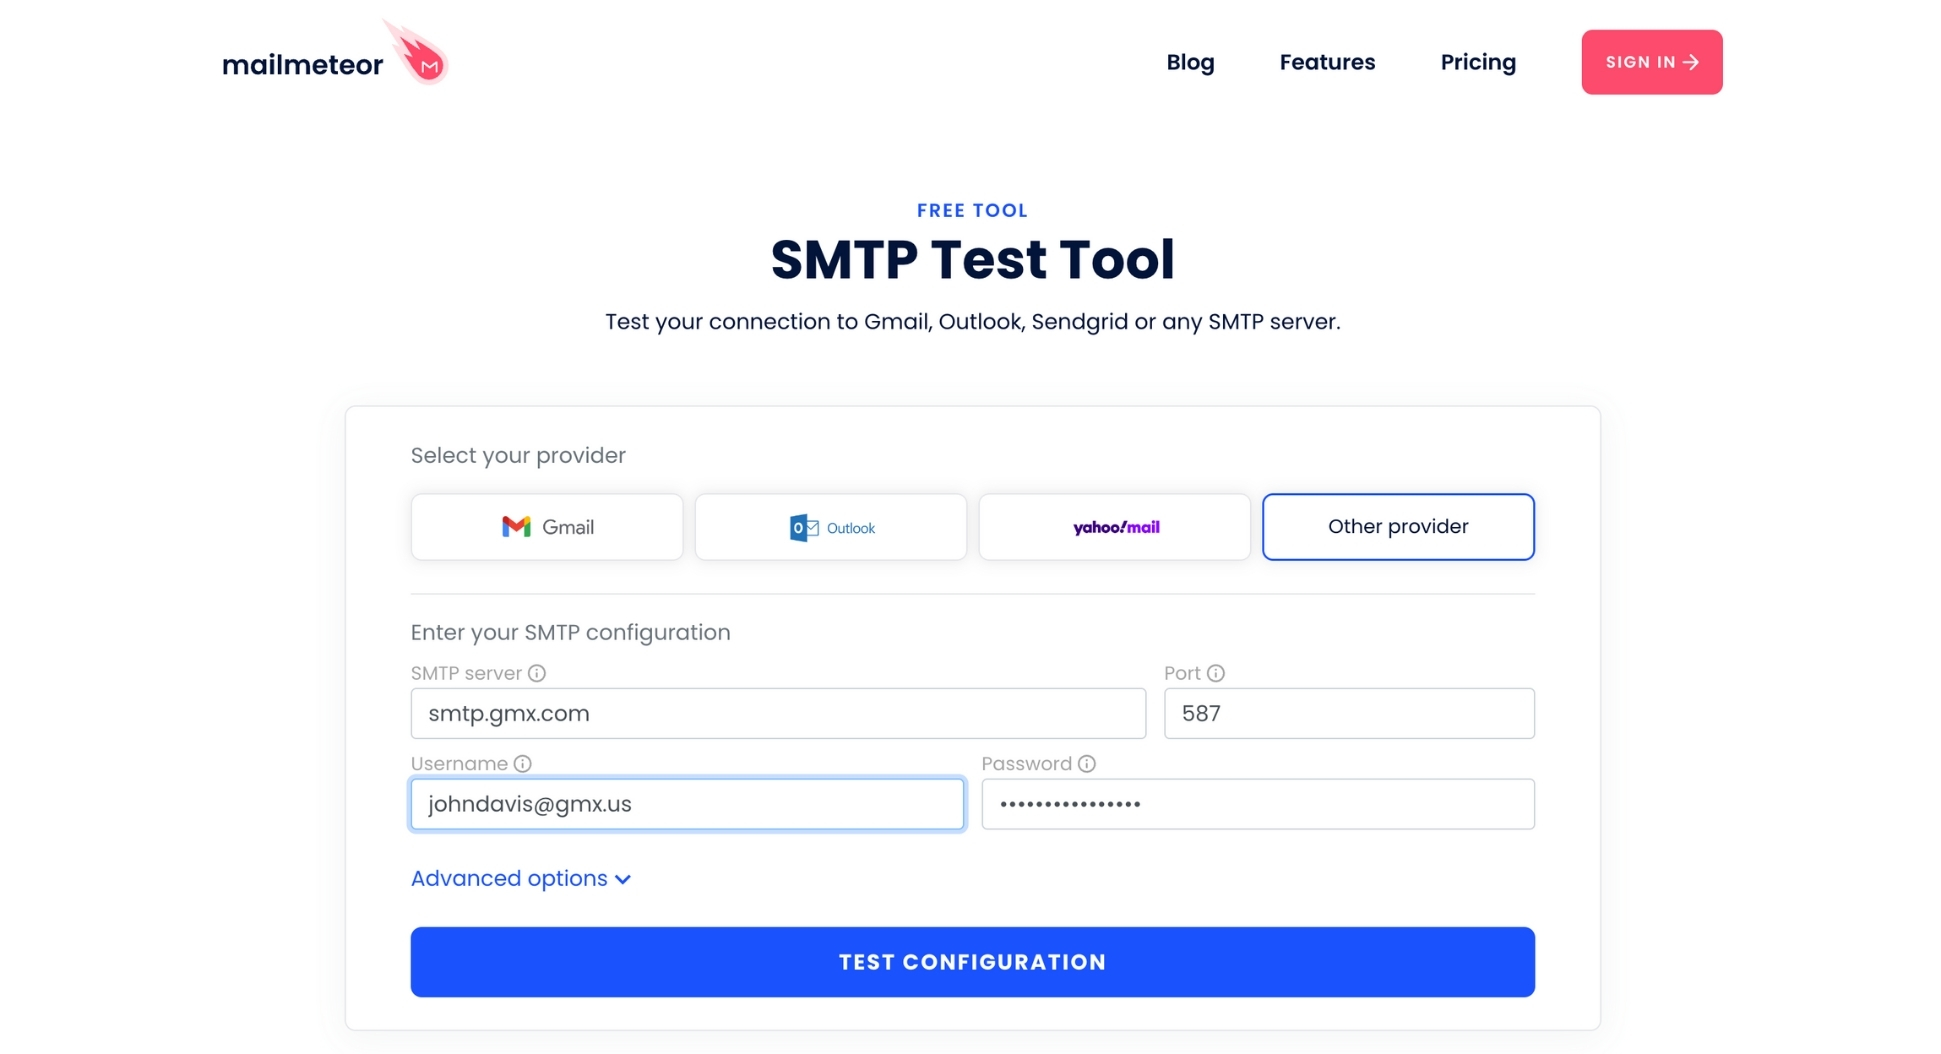
And done. The tool will now attempt to connect to the GMX SMTP server – and provide detailed insights into the success or failure of the operation, along with technical logs for further analysis.
Want to up your emailing game and get more out of your email marketing efforts? With Maimeteor you can send up to 2,000 emails, personalize your messages at scale, and track them in real-time.